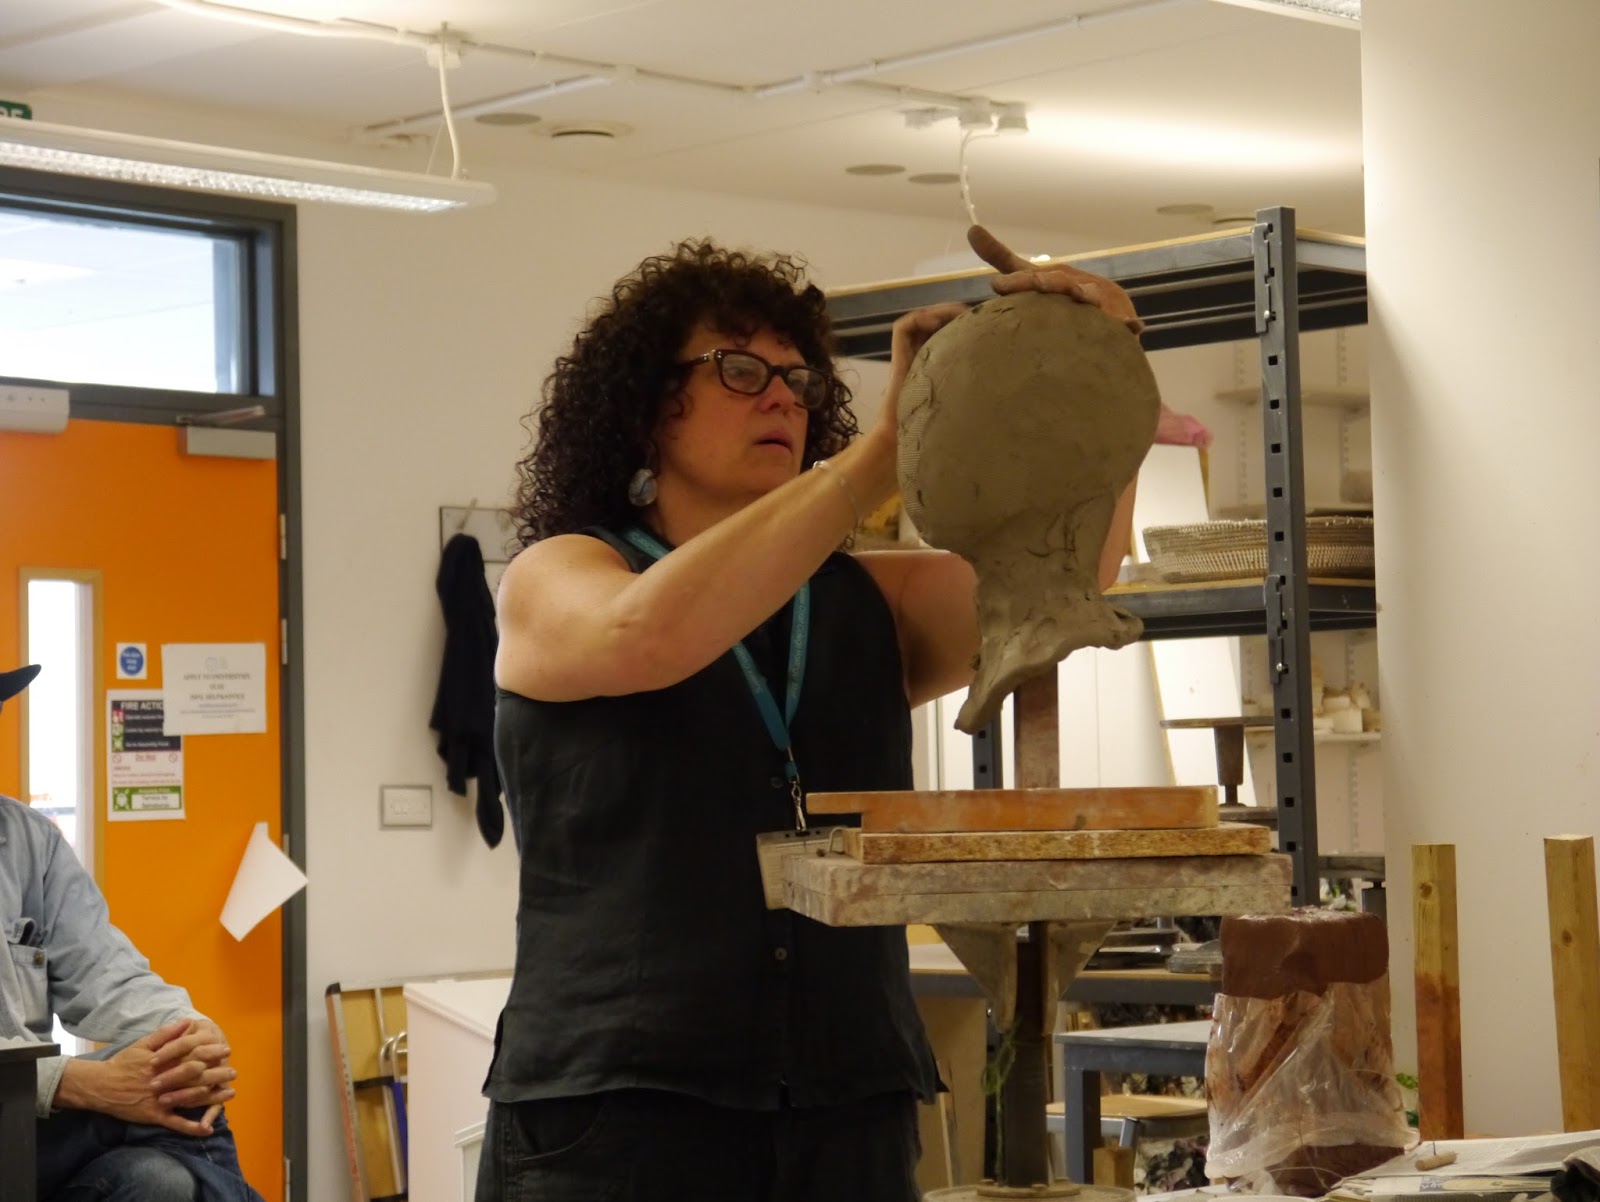
Monday 19 August 2013

The making of my sculpture

The process!
 
 
After the demonstration from Jackie we started making our own sculptures. A lot of people in the class had done portrait sculpture before and decided to do people they have done before to try and aim for perfection, whereas some people did babies and animals. I decided to do my mum because I am familiar with her facial features and thought it would be nice to have something personal I can keep for a long time.
 

I started by placing the newspaper around the wooden pole, I used a lot of tape because I felt that it helped hold the skull in place and made it easier to manipulate the shape. During this process I thought about the size and shape of my mums head, baring in mind the sculpture will shrink by 10% when fired. It also helped to look at a photograph of a skull to gauge where the jaw is.


This photograph shows the skull once I had completed the initial process. I made sure that the back of the skull was higher than the jaw bone and tried to add newspaper to where the cheek bones would be to create a more defined structure to work with. I was pleased with the way my skull turned out because I felt that it resembled a skull instead of just a ball, I then wrapped a plastic bag around the skull and tied it around the wooden pole to make it secure; this process took me around 15 minutes to complete when being precise.


When it came to putting the clay onto the skull I cut off a smaller slab of clay from the larger slab using the wire cut off tool, I curved and flattened the edges of the slab to make it easier to apply to the skull. Once I had covered the skull I felt that the layer was too thin and that I should have used thicker slabs to cover the skull. However I added more slabs of clay to the areas I felt where too thin, making sure to roll the clay on top of each other to avoid trapped air. I then beat the head with a wooden baton to release any air, and as you can see the neck has lengthened from the process.


I started adding to the face, marking out where the facial features should be and looking at my mums face to see how spread out her facial features are and looking at proportions.
I added coils of clay over the brow for the foundations of the eyebrows and to give the eye sockets more depth, also using my fingers to push the clay in to make the eye sockets. I first made a small triangle like shape for the nose and added it to the face, I felt that my mums nose was more like a long roman nose, so I added a thin long coil to the length of the nose and a small round ball to add to the end to give the nose length, using the wooden hand tools to create nostrils. I created a long thin oval shape to add as the mouth, to create body and volume which I could later work into.


My mum has quite high cheekbones so I decided to add clay to the cheek bones to make them more prominent, which you can see in this photo.  I also added coils to the jaw line to even up the proportion of the face and to evenly join down to the chin. I also felt that the neck was too thin, so to make the neck thicker I added 3 larger coils and worked them into the existing clay.
This photo also shows where I have made markings  for the ears.


When creating the eyes of my sculpture I started with making very small balls and placed them into the sockets using slip as a glue to secure them in place. Once the eyes balls where in place, I then made small thin coils to place around the eyeball to create upper and lower eyelids. During this process I looked at the shape of my mums eyes and the area around her eye to try and make it as similar as possible. I also added small pieces of clay beside the eyeball to make it more softer to look at, using the wooden hand tools to manipulate and shape the clay into the appropriate detail. Jackie came round and taught me certain techniques I could use with the hand tools to help with the detail.


This is a side view of the current process, you can see how I have shortened down the length of the nose and the beginning of life building up in the face. I found that when creating the sculpture I had to continuously look at my mums face and intensely observe her, even when we weren't in the lesson I couldn't help but stare at other peoples faces as well. I then started thinking about how I would go about creating their faces and everyone became a possible sculpture.  


EARS
On day two Jackie gave another demonstration on how to create ears for our portraiture, she explained that you start by making a small kidney shape of appropriate size and attach it to the head using slip and wooden hand tools to merge the clay together. Once the ear is attached you can use the loop hand tools to carve out the clay and create the detail of the ear.
I found that trying to create the kidney shape into the correct size was quite hard and it took a lot of practise to get the right shape; after a few attempts I was able to make the shape of the ear that I was happy with and used it as a template to create the other ear. I found that once the ear was attached it was easier to then add to the ear and take clay off the ear to make it exactly how you want it. During this process it is easy to make ears that are too big, so it helps to take a step back and look at your head from a distance and review the proportions. Once the ear is attached to the head and you have carved out your detail, you then make a long thin coil and place it behind the ear to give the ear more support and make it more secure so that the ear does not blow off in the kiln.
In this photo you can also see where I have drawn out the hair line in preparation for making hair.


HAIR
There are two different ways in which you can create hair, you can either add clay to the head or you can work into the head using tools. Sometimes you find that your head is quite thick so you can work into the head without breaking through it. However sometimes you may find that the thickness of your head is too thin and its best to add hair to the head separately. It also depends on what hair style you are trying to create. My mum always wears her hair up in a pony tail and I felt like it was a signature feature for my mum and wanted to keep that aspect of her. I decided that to make the hair I would try both techniques, adding clay to the head and working into the head using tools. I had already created a hair line and a parting down the middle of the head using the hand tools, from here I started at the hair line and made long thin coils, attaching them to the head using slip to stick them, otherwise they may have blown off in the kiln. Once I had attached a few coils next to each other, I then used the side of a hand tool and merged the sides of the coils together to create the effect of individual strands of hair leading down to the pony tail point.
In certain areas of the head I just used the hand tools to carry on the hair detail, however I found that I liked adding the clay separately to the head because I found it gave the hair better texture and volume.


Once I got down to the pony tail, I created a number of coils and lined them up on top of a larger coil that I was using as a hairband. I then curled the coil that I was using as the hairband to attach the hair securely, which then created a pony tail. To attach it to the head I used a lot of slip and held it to the head for a while until it stayed up on its own, as shown.
Once I had done this I then wanted to clean up the hair and soften it, I used hand tools to soften and tidy the ridges in the hair, giving it more structure.


DISMANTLEMENT
I then discovered that once we had nearly finished our heads, we had to cut part of the head off and cut out the paper skull, we had to do this otherwise the paper would burn inside the kiln.
During this process you have to think about how big your skull is and how much of the head you will have to cut off to get the paper skull out. When it came to cutting out the paper skull, I found that mine took a very long time because I had put so much tape around the skull. From this experience I would definitely have this in mind whenever I make another ceramic portraiture.
 
 Once the paper skull was out there were then a few steps I had to take before sticking the top of the head back on. Jackie explained that I should look at the thickness of the head and make sure that the layer of clay was even all the way around, this may either mean adding clay to the inside of your head, or taking some clay off the head. I felt that some of the head was too thin so I decided to add clay to the inside at the front, this process was delicate because when merging the two surfaces of the clay, it had a tendency to make the face itself bulge, so I had to be careful that I didn't break through the clay and ruin the face. At the back of the head the layer was quite thick so I used a loop tool to carve away some of the excess clay. I then placed the head onto a very large sponge, sometimes you may need to lay the head down to get to certain parts of the head, so you place the head onto a large sponge so that it doesn't crush any of the facial features on the face.
I placed my head onto a sponge so that I could carve some of the excess clay away from the neck, however I accidentally made a few holes in the neck, because of this I then had to attach some clay back on. This is why it is important to create even layers of clay at the very start of the process.
The final stage before sticking the top of the head back on was to use a 'Potters needle' to make small holes inside the head, making sure not to pierce all the way through the clay, the reason for this is so that any trapped air in the clay gets released before it goes in the kiln.


 RE-ATTACHMENT
 When re-attaching the top of the head, you start by cross hatching the rim of the head and the outer circle of the cut off piece so that they attach together more securely, you then use a lot of slip on both pieces and place the top back on. Then you use either your fingers or hand tools to merge the two sections of clay together. Sometimes if the layer of the head is too thin, the top of the head can sometimes dip and loose its form.


 FINISHED


Thursday 15 August 2013

Tools


Basic ceramic tools
 
Throughout the week we were given the basic ceramic tools to help us manipulate the clay and to create the perfect detail on our portraits.
Here are a list of some of the tools that were used throughout the week.
 
POTTERS NEEDLE:
This is the potters needle, this came in handy later on in the week when
I was creating air holes inside of the head to let out any trapped air before putting the head inside the kiln and has many other uses.


CUT OFF WIRE:

The cut off wire is used to cut sections of clay from the large slabs that it comes as, this makes sure that the clay is cut smoothly and evenly.


 SCRAPERS:


This is a metal scraper, it is also known as a kidney because of its shape and is made in either wood, metal or rubber. The metal scraper is used in both pottery and ceramic techniques and is used to smooth the surface of the clay.


LOOP TOOLS:

Loop tools are very handy for trimming down the surface of the clay and taking away excess clay where it is not needed.


WOODEN MODELLING TOOLS:

 
Wooden modelling tools come in a huge variety of shapes and sizes and are mostly used for hand building tasks. During the week I used the wooden tools a lot to form the features on my portrait.
 
 
SPONGES AND BRUSHES:

During the making of portrait sculptures it is important to keep the clay moist at all times so it doesn't dry out, you can use sponges and brushes to apply water to dry areas. Sponges and brushes are also used to smooth the surface of the clay and to make it appear softer.

The first day


Demonstration
 
 
The class consisted of 14 students, much of which were adults who are already part of the Hastings Valley Fine Art Association that I previously wrote about and are either part time or full time artists themselves.
We got straight into practical work and started off with a demonstration by Jackie in which she showed us the steps we would need to take in order to start off our portrait sculpture.
 
To start off you have a wooden base with a fixed wooden pole in the centre, this is important for holding up your model because it will be heavy and would collapse otherwise. You bunch up newspaper into flat, oval shapes and tape them onto the pole to create a skull like shape. Jackie gave us pictures of skulls to show us how the chin and the jaw bone is lower than the back of the skull which helps later on. The key to portraiture ceramics is to always start with a basic shape which you can then add to, to create more life like forms and detail. With this stage you want to start with sections of paper on top of the pole, the back and the sides and then build onto those sections to make the skull whatever size you feel will be appropriate for the person you are creating, thinking about their head size and shape baring in mind that the sculpture will shrink 10% once it has been fired.


You then need to put a plastic bag over the paper skull. You do this because it stops the clay from drying out and the clay getting stuck to the paper.
There are different types of clay that you can use when creating portraits, and it mostly comes down to personal preference, some people in the class who have had more experience decided to use a different clay. What Jackie is using in her demonstration is earthenware clay which is the softest out of all three clay and can be fired at the lowest temperatures and when fired the clay turns into a very light cream colour.
There is also stoneware clay which is usually fired at higher temperatures and is stronger and more grainy than earthenware clay and it is used more for industrial purposes as it is also usually leak proof and more retainable. When fired the clay can either be a grey to dark grey colour or sometimes a brown. Finally there is porcelain clay which is originated from China and is know as China clay, porcelain clay burns at a very high temperature and is harder to form because of its low plasticity which makes it easier to become cracked and deformed when in the firing process. Porcelain is formed of tiny particles which makes it extremely smooth.
To apply the clay onto the head you roll out the clay into flat slabs, making sure the slabs aren't too thin because it will make the sculpture weaker. You then roll the slab onto the paper skull, the reason why you roll the clay on instead of just placing it on the skull is so that no air gets trapped between the two layers, when attaching two slabs together you again roll one side of the slab onto another side of the slab that has already been placed onto the skull. You continue this process until the skull is completely covered in clay, using quite big slabs of clay so that you don't risk the pieces blowing apart in the firing process and to keep the head even.


Once you have finished putting the slabs onto the head you use a wooden baton to bash the head, this gets rid of any trapped air between the layers of the clay. You may notice that if there is a lot of trapped air in the head that the clay itself will start to move further down the pole, this may mean that you need to cut some of the clay around the neck off. It is a good idea to do this before you start the shoulders otherwise you may be left with an extremely long neck and have to start the shoulders again. Here Jackie has added coils around the neck to create the idea of shoulders. To do this, roll out the clay making 2/3 coils about 2 inches in diameter each and roll them around the bottom on the neck so that half of the coil is lower than the neck itself, making sure that there is more clay build up at the base, you can see in the picture that the shoulders slope down.
 
 
 This stage is where we start to think about where the facial features will go and the proportions of each facial feature. To mark out where everything will go we used the same technique as you would use in life drawing.


These are some of the markings that Jackie made on the face to show us where we should put the facial features and to help give us the correct alignment.
Once the markings are drawn out onto the face you can then push the clay to make eye sockets, make a small triangular shape and add it to where the nose will be, this doesn't have to resemble the person you are creating too much because you can add detail later. At this stage you can also add a long oval shape to where the mouth will be to add dimension, making sure the features aren't flat against the face.
 We were also taught to think about the muscle structure of the face and she gave us tips like adding coils to the brow and jawline to bring out personal features.


Introduction to ceramics summer school course

 
About the course
  
The ceramics summer course started on the 15/7/13 and lasted for a duration of 5 days, a total of 35 hours throughout the week. Before applying for the ceramics course, I had no previous experience with ceramics or pottery and was keen to try new skills as ceramics and sculpture is something I am very much interested in.
The 5 day course consisted of learning different hand-building skills, such as coiling, slab building and modelling and using these skills to produce one or more finished pieces. There were demonstrations throughout the course from the teacher, Jackie Summerfield who has 30 years of ceramic experience and specialises in portraiture. She was inspirational, patient and a lovely woman who guided us through the week.
Whenever I thought about ceramics I usually thought about pots and bowls and ornamental objects, however upon this course we were introduced to portraiture ceramics, which isn't something I had thought about before.
 
These are just a few of Jackie's pieces  


Bob (Commissioned) 
 
 Grey Owl (Archie Belaney)
 
 Joe (Commissioned)


Artish Research Two

JANE HAMILTON

Jane Hamilton was born in 1950 and at a young age found a passion for art and was very much influenced by Michelangelo and the Renaissance period. Her art education began at Falmouth School of Art and later went on to study art at The City And Guild School Of Art in London. Jane had studied art for a long period of time throughout her life and was especially drawn to the human form and expression of human emotion, she does this by creating human sculptures, concentrating on the emotion in the face. She also has an interest in dance and the movement of the human body and how that also links to emotion.
Jane has been working professionally for 20 years, the majority of her work being commissioned portraits of clients, even though she has work in private collections around the world in countries such as America, New Zealand, Canada, Nigeria, Hong Kong and England.
 
Here is a sample of some of her work.
 
Lord George Worsley
 

Emily Pennant-Rea


Sir Clement Freud

Tuesday 13 August 2013

Ceramic History

Ceramic History
 

The use of ceramics is believed to date back to 24,000 BC and was used in developed countries around the world, especially Egypt, Rome and Greece which are well known for ancient ceramics and are seen in many museums around the world, however the very early findings of ceramics were in east Asian, China and Japan where they used ceramics to create ornaments and figurines that would worship animals and important human figures in their own cultural styles. Clay was later used in industrial uses, making tiles and bricks, it was also a key element in the discovery of glass. It was round 10,000 BC that pottery became more understood and people would create vases and bowls and decorate them with symbols and figures to do this they used the 'coiling' techniques which is still used today, they later discovered the potters wheel which was widely known across Asia and much of Africa.

Here are some pictures of the different styles of ceramics and pottery throughout different countries


Dating back to the 13th century these ceramic pieces come from China and were brought throughout Asia and Europe and much loved by many kings for their beauty and their resemblance to Chinese Jade.


This Ceramics piece comes from Japan.  Japan created a lot of plate style pieces that were decorated in delicate cultural styled designs which we can still find being produced today.  What I like most about this style is the simplicity and its ability to bring a sense of calm and relaxation.  For me this design brings a sense of peace.


During the 8th to 18th century in Islamic art, glazed ceramics were at their peak.  The pottery created by Islamic artists was highly decorated, portraying figurative scenes and elaborative script.  Iraq was the first to discover tin opacified glazing dating from the 8th century.  For me these ceramic pieces are very strong and hold a heavy presence and I think for me that represents the country itself and shows the kind of power that they possess.


Tin glazing, first discovered in Iraq then spread through the world to countries like, Egypt, Persia, Spain, Italy, Holland, England and France.  There were different styles that people created, using the tin glazing technique, some of which were Moresque, Delftware and English Delftware.  The Moresque design was the most popular throughout Europe and was considered the most sophisticated at the time, which lead to household decorative ornaments and tiles.  However, because of this, it meant there was less demand for Delftware.  Tin glazing is now expensive to use compared to other glazes available and is mainly used by studio potters, fired in specialised low temperatures; in fact Pablo Picasso produced ceramic pieces using tin glaze.


Art Association in Hastings


Hastings Valley Fine Art Association
 
It is well known that a lot of places down by the coast have a large interest in art, when visiting difference places in the south you notice a wide variety of art shops and galleries. There is also a high percentage of ceramicists by the coast compared to that of painters and photographers.
In Hastings a lot of older people attend art courses at the college over the summer and also weekly sessions, the majority of these people are members of the Hastings valley fine art association.
The Hastings Valley Fine Art Association is a members club where people can join to engage in meetings and activities that are all based around fine art subjects. The association was first created 25 years ago by a small group of inspiring painters and since then has grown interest by people far and wide and now consists of 150 members.
 

The club offers a wide range of frequent activities to encourage people to practise in fine art, the link for the activity page on their website is shown below.
Activity page
 
Here is a link to some images of the art work created by members of the association
artists work


Thursday 8 August 2013

Artist Research One

Lindy Barletta
 
Lindy first experimented with clay when she was 11 years old and fell in love with it, however throughout her further education and early career Lindy studied at Hereford College of Art and specialised in textile design, she later went on to have a career in management at the Chelsea Arts Club for a period of time before she moved onto a second career in Interior Design specialising in putting colour schemes and pattern together; its her keen eye for design that helps her with her successful ceramic designs.
It was only years later that Lindy decided she wanted to get back into pottery and started her ceramic journey.
There are a lot of designs you can create using the techniques of ceramics and pottery, Lindy specialises in making unique and individual teapots, bowls and plates decorating them using layers of oxides, slip with sgraffito and multiple layers of stoneware glazes. Glazes are strong and beautiful colours which get used to decorate ceramic work, glazes come in all different colours and finishes and are something you can continuously experiment with. Lindy
has written about her love for ceramics in which she talks about when she works with clay, she responds to the clay with every sensitivity and how it responded to her with every touch and every changing shape. She talks about the process of making her pieces and how she can instantly know when she starts whether the piece will be successful for whether she will have to start again. Because of her love for ceramic she went on to study City and guilds Ceramics Level 3,
City and Guilds Glaze and Firing Level 3 and later opened her own workshop in 2002 called sheen pottery where she works and creates her ceramic pieces.
Lindy has also won awards for her ceramic work including
December 2012 – Best Functional Piece for a large Teapot with slip and sgraffito decoration at London Potters Exhibition.
December 2011 - 'Highly Commended' for teapot exhibited at the London Potters Morley Gallery Exhibition
She is currently offering ceramic workshops at sheen pottery 4 times a week allowing beginners and experienced students, teaching a wide range of ceramic techniques.
 
 
In my experience, when creating a piece of ceramics the ability to manipulate the clay into whatever form you want can turn into an obsession where you cant stop changing the clay until you feel it is perfect. Sometimes you can go too far and loose yourself which leads you away from your original design.
 
Photos of Lindy's work below
 
 
Ceramics by Lindy Barletta at Studiopottery.co.uk - 2010.
 
 
Ceramics by Lindy Barletta at Studiopottery.co.uk - 2013.


Ceramics by Lindy Barletta at Studiopottery.co.uk - 2012.

To create plates, especially if you are producing more than one of the same plate, you can use a technique called casting which is where you create a cast which you can use over and over again and will form the clay into the same shape, size and design the only part left is to fire and glaze the piece. I think that one of the most important factors when creating a successful and unique piece of pottery is the glazing. I feel that the glazing is what brings a piece to life and gives the piece the artists personal touch. The variety of glazes are endless and you can mix them to create whatever design you like, continuing to develop and create new effects.

Introduction to Ceramics unit

 
Ceramic Art London
 
 
CERAMIC ART LONDON Ceramic art London is the leading fair for contemporary ceramics in London which runs over one weekend every year at the Royal college of art. The fair allows national and international ceramicists to showcase and sell their work to the public; other ceramic artists and professional buyers. In my personal opinion I feel that a career in ceramics is one that is hard to be successful in as there isn't a high public demand for it as individual pieces of art and isn't something that is exhibited on a high end scale. Because of this the fair aims to educate people in studio ceramics, to do this they include programme talks, demonstrations and film introductions to ceramic to increase the publics knowledge of ceramics and get more people interested in ceramics, it is also a good opportunity for young and aspiring ceramic artists to get talent spotted and acknowledged by collectors and gallery owners.
The ceramic art London fair is presented by the Craft Potters Association (CPA), the CPA were established in 1958 and represent ceramics and ceramic artists all over the UK; their aim is to support and encourage the idea and creation of ceramics and to raise the profile of ceramics to the public.
The CPA started off as a small group of ceramic artists trying to interest people in pottery, however the association has grown tremendously throughout the years and now includes nearly 1000 members. The CPA is open to new associate members and professional members the link to more information about the membership is shown below. CPA email
 
The CPA owns their own gallery in central London which exhibits work from the CPA members all year round which are available for sale. They previously had to move their gallery into a larger space because of the growing number of members and are currently working towards owning another gallery which will exhibit more themed solo exhibitions by young up coming ceramic artists. I think that by having a permanent gallery to showcase artists work all year round has helped the organisation to raise awareness of ceramic art which is what their aim is, their methods are widely evolved around using education of ceramics to spread the word. In 1991, the CPA set up a charitable trust to help raise money to put forwards ceramic education in the CPA gallery. Some of the trustees involved in the charity are members of the Crafts Council, former officials and current members of the CPA and fund the charity by giving donations and help to organise fundraisers.
 
Here are some photos of ceramic pieces done by just a few of the CPA members.
Ceramic Arts London - Adam Frew -
Adam Frew
Ceramic Arts London - Laurance Simon -
Laurence Simon


Ceramic Arts London - Sasha Wardell -
Sasha Wardell