Demonstration
The class consisted of 14 students, much of which were adults who are already part of the Hastings Valley Fine Art Association that I previously wrote about and are either part time or full time artists themselves.
We got straight into practical work and started off with a demonstration by Jackie in which she showed us the steps we would need to take in order to start off our portrait sculpture.
 |
To start off you have a wooden base with a fixed wooden pole in the centre, this is important for holding up your model because it will be heavy and would collapse otherwise. You bunch up newspaper into flat, oval shapes and tape them onto the pole to create a skull like shape. Jackie gave us pictures of skulls to show us how the chin and the jaw bone is lower than the back of the skull which helps later on. The key to portraiture ceramics is to always start with a basic shape which you can then add to, to create more life like forms and detail. With this stage you want to start with sections of paper on top of the pole, the back and the sides and then build onto those sections to make the skull whatever size you feel will be appropriate for the person you are creating, thinking about their head size and shape baring in mind that the sculpture will shrink 10% once it has been fired.  You then need to put a plastic bag over the paper skull. You do this because it stops the clay from drying out and the clay getting stuck to the paper. There are different types of clay that you can use when creating portraits, and it mostly comes down to personal preference, some people in the class who have had more experience decided to use a different clay. What Jackie is using in her demonstration is earthenware clay which is the softest out of all three clay and can be fired at the lowest temperatures and when fired the clay turns into a very light cream colour. There is also stoneware clay which is usually fired at higher temperatures and is stronger and more grainy than earthenware clay and it is used more for industrial purposes as it is also usually leak proof and more retainable. When fired the clay can either be a grey to dark grey colour or sometimes a brown. Finally there is porcelain clay which is originated from China and is know as China clay, porcelain clay burns at a very high temperature and is harder to form because of its low plasticity which makes it easier to become cracked and deformed when in the firing process. Porcelain is formed of tiny particles which makes it extremely smooth. To apply the clay onto the head you roll out the clay into flat slabs, making sure the slabs aren't too thin because it will make the sculpture weaker. You then roll the slab onto the paper skull, the reason why you roll the clay on instead of just placing it on the skull is so that no air gets trapped between the two layers, when attaching two slabs together you again roll one side of the slab onto another side of the slab that has already been placed onto the skull. You continue this process until the skull is completely covered in clay, using quite big slabs of clay so that you don't risk the pieces blowing apart in the firing process and to keep the head even. 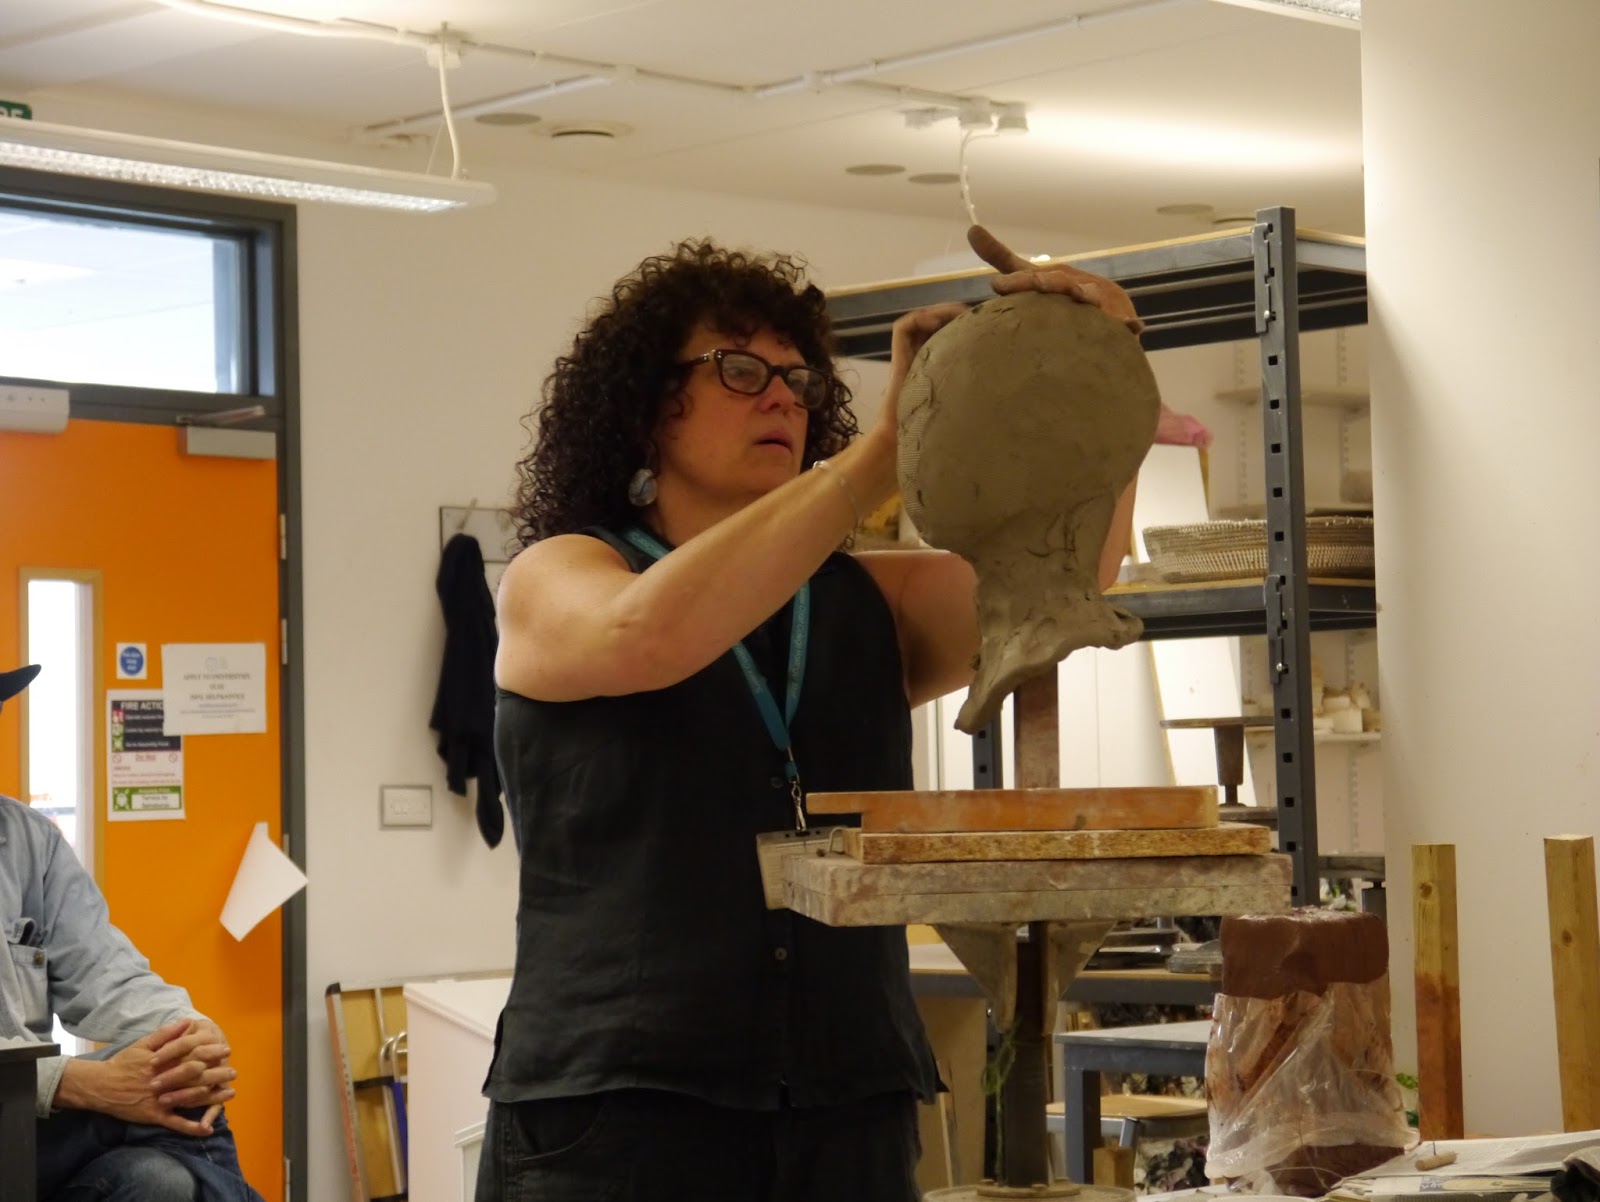
Once you have finished putting the slabs onto the head you use a wooden baton to bash the head, this gets rid of any trapped air between the layers of the clay. You may notice that if there is a lot of trapped air in the head that the clay itself will start to move further down the pole, this may mean that you need to cut some of the clay around the neck off. It is a good idea to do this before you start the shoulders otherwise you may be left with an extremely long neck and have to start the shoulders again. Here Jackie has added coils around the neck to create the idea of shoulders. To do this, roll out the clay making 2/3 coils about 2 inches in diameter each and roll them around the bottom on the neck so that half of the coil is lower than the neck itself, making sure that there is more clay build up at the base, you can see in the picture that the shoulders slope down.
 These are some of the markings that Jackie made on the face to show us where we should put the facial features and to help give us the correct alignment. Once the markings are drawn out onto the face you can then push the clay to make eye sockets, make a small triangular shape and add it to where the nose will be, this doesn't have to resemble the person you are creating too much because you can add detail later. At this stage you can also add a long oval shape to where the mouth will be to add dimension, making sure the features aren't flat against the face. We were also taught to think about the muscle structure of the face and she gave us tips like adding coils to the brow and jawline to bring out personal features. |
No comments:
Post a Comment